


I found this recipe in the latest Martha Stewart Living magazine. I don’t use a lot of Martha Stewart’s recipes. I have found in the past that a lot of them seem to be lacking a few instructions. This one turned out good, except it needed to be cooked about 10 minutes longer than the recipe states, but that may have been because of my oven. I will list the original recipe cooking time, but be aware that you may have to cook it a little longer for the middle to set up correctly.
Vegetable oil cooking spray
2 cups plus 2 tablespoons all-purpose flour
3/4 cup unsweetened cocoa powder
1 tsp baking soda
1/2 tsp salt
10 oz (2 1/2 sticks) unsalted butter, softened
2 cups granulated sugar
3 large eggs
2 1/2 tsp vanilla extract
8 oz cream cheese, softened
1/2 cup confectioners sugar

Coat a 9×13” baking pan with cooking spray. Line dish with parchment paper, leaving a 2 inch overhang on both long sides, then spray parchment.

Sift flour, cocoa powder, baking soda, and salt onto a paper plate or in a bowl. Cream butter and granulated sugar with a mixer until smooth.


Add 2 eggs and 2 teaspoons vanilla, and beat until smooth, scraping down sides of bowl. Reduce speed to low; add flour mixture. Increase speed to medium; beat until incorporated.


Reserve 1 cup of dough; cover and refrigerate. Press remaining dough into bottom of prepared dish using a piece of wax paper. Refrigerate for 30 minutes. Preheat oven to 325 and bake until base is set and edges are puffed, about 25 minutes. Let cool.


Mix cream cheese, confectioners sugar, and remaining egg and 1/2 tsp vanilla in a medium bowl. Spread over cooled base; crumble reserved dough on top. Bake until filling is set, 25-30 minutes. (Remember, this may need to be extended for about 10 more minutes.) Let cool on a wire rack and then refrigerate for at least 1 hour or overnight. Using the parchment paper, remove the bars from the dish and cut into small squares. The bars will keep, covered and refrigerated, for up to 3 days.


Posted in Cooking |
Usually around Christmas, I will make Oreo truffles. They are very chocolate-y and decadent. The idea came to me that Nutter Butter cookies would be a great substitute for the oreos, so I decided to give it a go. I must say, I was right! These are really good! They are also pretty simple, only containing 3 ingredients. If you want to try your hand at candy-making, this is a good place to start. You will need…
1 lb package Nutter Butter Cookies
8oz cream cheese, room temperature
12oz milk chocolate candy coating wafers

Break the cookies in 3 pieces and place in the bowl of a food processer. I have a mini chopper so I did mine in batches. Process until the cookies are ground into fine crumbs.


Place the crumbs in a mixing bowl along with the cream cheese which has been cut into cubes. Mix with a hand-held mixer until thoroughly combine.


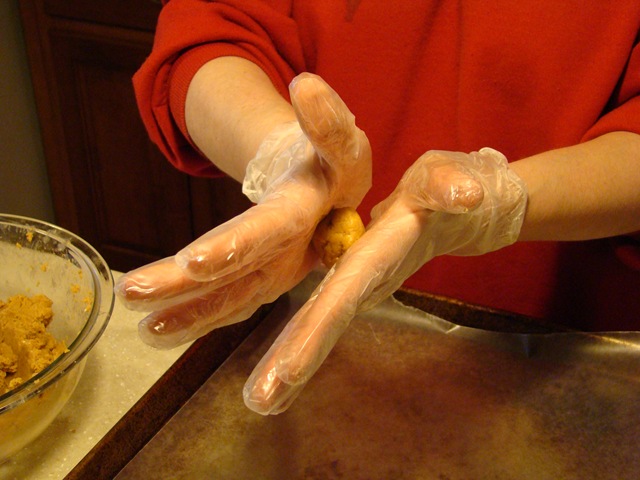
Picking up about a teaspoon of the mixture, roll it into a ball. I use plastic gloves for this because the mix can be a bit sticky. Place on a wax-paper lined baking sheet and chill for at least 30 minutes or until firm. Thanks to my husband for helping with these pictures. It’s hard to roll with 2 hands and try to snap a photo at the same time.


When the balls are chilled, it’s time to dip! Pour the candy coating wafers into a microwave safe bowl. Microwave on high for 1 minute, then stir. Continue to cook for 30 seconds at a time until the wafers melt when stirred. It should not take over two minutes total. Dip each ball into the coating and place back on the wax paper. Allow to set up for at least an hour. Pack in an airtight contain and enjoy!


Posted in Cooking | 3 Comments »
March has been strutting it’s stuff the last couple of days. Yesterday, around 1:30pm, the snow started to fall. Last night around 9:00, it was still falling FAST! This morning, it was a winter wonderland, AGAIN! By this afternoon, just about all the snow was gone, and the green grass was shining!
Hopefully, we have seen the last of the snow for a while. It was pretty weird to see snow on the ground around the blooming forsythias and pear trees.


Posted in Home |
I know, it’s not as catchy as Snakes On A Plane, but I’m not making a movie. As many of you know, I am a professional court system paper pusher in our little town. Last year, we had a snake problem. The soffit over the front door of my workplace had a hole in it and a mama snake thought this would be the perfect place to raise her children. Guess what, they’re bbbaaaaccckkk!! There were 3 baby snakes sunning on the evergreen by the front porch today. Oh, joy! You know I just love snakes…dead ones! I could have gotten photo evidence of this, but it gave me the creeps to think of taking pictures of snakes, so you’ll just have to take my word for it.
For some better news, our new local pizza joint had a friends/family meal today! Their official opening day is tomorrow, but since we are close with the owners, we got to try it out for free! The pizza is delish. We also have cinnamon bread, but I was so full that I just brought that home for later. Yum! Everyone really seemed to enjoy it. You can see for yourself below, and, yes, we ate the whole thing!


Posted in Our Town |
I have wanted to start a blog for a little while, and with my husband’s blessing and help (he came up with the great name), it is now a reality. The name stems from two joys of mine, photography and cooking. I hope you enjoy the fruits of both of my labors as I start this journey. There are many blogs that I enjoy reading, and I hope this blog entertains you, the reader. Below are a couple of photos taken on the farm where we live. One is my current header photo, but I may have to change that with the seasons. Please come back often!


Posted in Photography |
