


Posted in Pets/Animals, Photography on October 28, 2009| 1 Comment »
Posted in Cooking on October 25, 2009| 4 Comments »
Oh. My. Goodness. Every once in a while I will find a new recipe that just amazes me and this is one of them. My favorite style of cooking is Classic Southern Cuisine. The magazine, “Taste of the South”, is a great place to find these kind of recipes.
This cake recipe was in their August/September 2009 issue. The photo immediately caught my eye and the fact that it said “easy caramel” didn’t hurt either. You can cheat a little with this one because it uses jarred caramel sauce and does not require the homemade real deal which is notoriously hard to make. The cake part by itself is great and you can use this recipe with any toppings you like, but the caramel is wonderful! Try it…I think you will like it.
2 cups cake flour
2 tsp baking powder
1/2 tsp salt
1/2 cup unsalted butter, softened
1/2 cup granulated sugar
1/2 cup firmly packed light brown sugar
3 large eggs
3 tsp vanilla, divided
3/4 cup half-and-half
2 12oz jars prepared caramel topping, divided
2 8oz packages cream cheese, softened
3 cups confectioner’s sugar

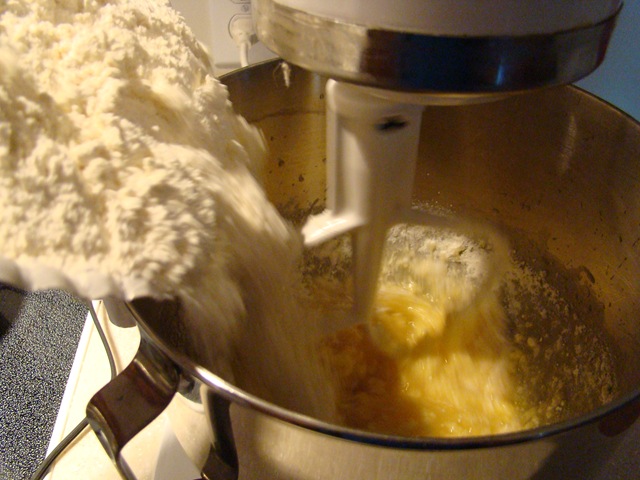
Preheat oven to 350. Grease a 13×9 baking dish and set aside. Sift together flour, baking powder and salt. In a large bowl, beat butter, granulated sugar and brown sugar with an electric mixer until light and fluffy, about 5 minutes.


Add eggs, one at a time, stirring to combine after each one. Add vanilla.
With mixer on low, add flour in 3 batches, alternating with half-and-half and beating until smooth. Spread batter in prepared pan. Bake for 25-30 minutes or until a wooden pick inserted near the center comes out clean.


Using a wooden spoon handle, poke several holes in the warm cake. Pour 1 jar of caramel topping over the cake. Let it sit at room temperature for several hours to absorb all of the caramel.


For the frosting: In a large bowl, combine cream cheese and 1 tsp vanilla. Beat at medium-high speed with an electric mixer until creamy. Add confectioner’s sugar 1 cup at a time, beating until smooth.


Spread the frosting over the cooled cake. Pour the remaining jar of caramel topping over the frosting in a zigzag pattern. Drag a butter knife through the topping to create your desired design. Store tightly covered in the refrigerator for up to 5 days. (If it lasts that long!)


Posted in Home, Photography on October 21, 2009|
Posted in Cooking on October 18, 2009| 1 Comment »
I do not bake cookies very often. I have always had more luck with cakes than cookies for some reason. But every once in a while, a cookie recipe will really stick with me. This is one of them. This was featured on the “Martha Stewart Living” television show on April 13, 1998. It was supposedly her daughter’s favorite and I can see why. This is the best of both worlds with the soft chewy peanut butter cookie with a few chocolate chips thrown in for good measure.
1 stick unsalted butter, room temperature
1/2 cup granulated sugar
1/2 cup light brown sugar
3/4 cup creamy peanut butter
1 cup all purpose flour
3/4 tsp baking soda
1 large egg
1 tsp vanilla
1 cup semi-sweet chocolate chips

Preheat oven to 350. With an electric mixer, cream butter with the 2 sugars.

Add peanut butter, eggs, and vanilla.

Sift together flour and baking soda. Stop mixer and scrape down the sides of the bowl. Add dry ingredients at low speed.


Stir in chocolate chips. Drop by heaping teaspoonfuls onto a prepared cookie sheet. Bake for 10-13 minutes per batch.


Would anyone care for a cold glass of milk to go along with these?
Posted in Pets/Animals on October 14, 2009|
Posted in Cooking on October 11, 2009| 4 Comments »
I LOVE pasta! C isn’t as enthusiastic as I am about it, so I usually fix it for my family. I was off from work on Thursday and, unusually, did not have a thousand things to do, so I made lunch for them.
This recipe is one of my favorites. It is easy and delicious comfort food. You can adjust any of the ingredients you like because I rarely measure anything when I make this!
16 oz. box of rotini pasta (I also use spaghetti and angel hair.)
26 oz. jar tomato basil pasta sauce (use any kind you like)
1 lb. ground beef
2 1/2 cups shredded mozzarella cheese

Fill your largest pot with water and bring to a boil. Dump in pasta and cook for 8-10 minutes.


Brown the ground beef and drain off the fat.

Preheat the oven to 375 while these are cooking. Spray a 13×9” baking dish with non-stick spray. Drain the pasta and put back into the pot. I do this so I don’t mess up another bowl.

Add the cooked beef, sauce and 1 1/2 cups of cheese and stir to combine.


You can warm this and eat it just like it is, but I like it baked. Pour the entire amount into the sprayed baking dish and top with the remaining cheese. Bake for 15-18 minutes or until the cheese is completely melted and the whole thing is hot. Yummy!


Posted in Gardening, Home, Photography on October 7, 2009|
Posted in Cooking on October 4, 2009| 3 Comments »
I found this recipe on another blog that I read, www.bumblebeeblog.com. The post on October 18, 2008 that contained this recipe told a story about her mom and how she made interesting meals on a small budget. The writer told how her mother would always have homemade desserts for the family and this was one of their favorites. It may become one of my family’s favorites as well. It is easy and really, really good. Give it a try! As the Bumblebee Blog writer said, if you have never tried to make a cake from scratch, this would be a good starting place.
For the cake:
1 cup sugar
1/2 cup (1 stick) butter
2 cups all-purpose flour
1 1/2 tsp baking powder
1/4 tsp baking soda
1/4 tsp salt
1 tsp vanilla
1 egg
3/4 cup buttermilk
1 cup mini marshmallows
1/2 cup semi-sweet chocolate chips

Preheat oven to 350 degrees. Cream together sugar and butter with a mixer. Mix flour, baking powder, soda, and salt in a bowl. Since I used powdered buttermilk, I also added the powder in with these dry ingredients. There is a conversion chart on the container. Add egg, vanilla, and water (in place of buttermilk) to the sugar/butter mixture. Gradually add the dry ingredients and mix until well combined. Fold in the marshmallows and chips by hand.


Spread batter in a greased 13×9” baking dish. The batter will be thick. Bake for 40-45 minutes or until tester comes out clean. Cool for 10-15 minutes before topping.


FOR TOPPING:
1 cup sugar
1/3 can evaporated milk
1/2 cup (1 stick butter)
6 oz chocolate chips
Bring sugar, milk and butter to a boil. Remove from heat and stir in chips until they are melted. Pour over the cake and allow to set up. ENJOY!!


C & I moved into our newly-built home three and a half years ago and we have been slowly finishing things since then. The front yard has been a work in progress since that time, and this summer has seen the culmination of many ideas. We are not completely finished yet, but we are VERY close!
Back in the early spring, additional shrubs and roses were bought and planted. Throughout the summer, we added edging, lights and landscape rock. Ta Da! It has been a lot of work, but we think it has turned out great!
Here are a couple of before shots:


During…


More during…


A few late nights…

And finally, success!


Now we can sit back and enjoy the fruits of our labor! (Or sit back and figure out what our next project will be.)


